How to View Drone Imagery and GeoTIFF Files on iPhone & iPad
You flew the field, the drone software stitched the photos, and now you have a big orthomosaic on your computer. The useful place for it is out in the field, on the phone in your pocket, sitting exactly where it belongs on the map, so you can walk to the wet spot, the weak rows or the washed-out corner and see them for yourself.
That file is almost always a GeoTIFF: an ordinary TIFF image with its location built in. GoGIS reads that location, turns the image into map tiles on your iPhone or iPad, and draws it over the basemap in its real-world position. After that it works offline, like the rest of your project.
What Is a GeoTIFF?
A normal photo knows nothing about where it was taken on the ground. A GeoTIFF carries extra tags that say where its corners fall and which coordinate system it uses, so a map app can stretch it into place. Drone processing tools (WebODM, Pix4D and others), desktop GIS such as QGIS, and many government imagery downloads all produce GeoTIFFs. Old scanned USGS topo maps often come as GeoTIFFs too.
Your vector files from part 1 are shapes with a table behind them. Imagery is the opposite: a picture with no table, just pixels. In GoGIS the two sit together, so you can see your field boundaries, sample points or parcel lines on top of your own fresh imagery.
Getting the File onto Your iPhone or iPad
First put the GeoTIFF somewhere your iPhone or iPad can see it: AirDrop it from your Mac, save it to iCloud Drive or another cloud folder in the Files app, or copy it over with a cable. Drone mosaics can be hundreds of megabytes, so AirDrop or a cable is usually quicker than email.
Importing the GeoTIFF in GoGIS
- Open GoGIS and open the Layers panel.
- Tap the import button (the page with a plus) and choose Import File.
- Find your .tif or .tiff file in the file browser and tap it.
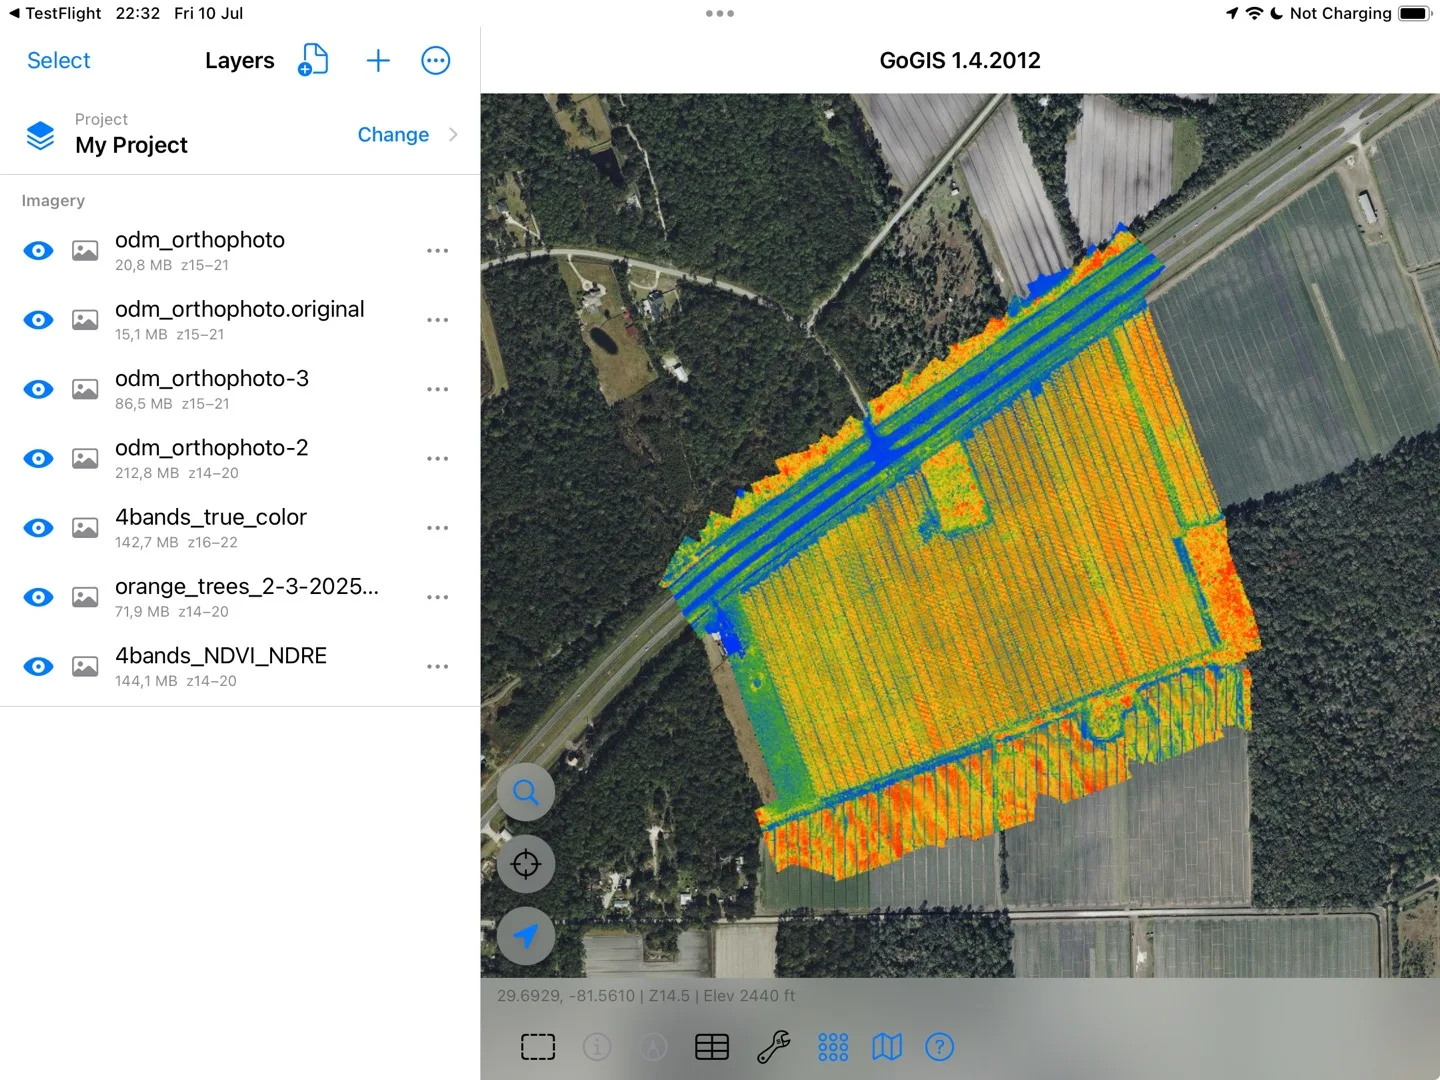
GoGIS reads the image and its location, then builds map tiles on the device. You'll see the progress as it goes (reading, preparing an overview, building tiles). A large orthomosaic can take a few minutes; GoGIS keeps the screen awake while it works. When it's done, the map zooms to your imagery and it appears under Imagery in the Layers panel, with its size and zoom range.
Working with Your Imagery
- Show and hide. Each imagery layer has its own eye button, so you can keep several flights or dates and switch between them.
- Opacity. Turn a layer partly see-through to compare it with the basemap, or with last month's flight underneath.
- Your data on top. Field boundaries, sample points, parcels and anything you collect draw over the imagery, so you can mark what you find right where you see it.
- Find your way to it. The GPS dot shows where you're standing on the image, so you can walk straight to the spot that looks wrong.
- Offline. The tiles are stored on the device. Once imported, the imagery draws with no cell service or Wi-Fi.
Which GeoTIFFs Work Best
The best file for the field is the same one you'd look at on a screen: an 8-bit RGB or RGBA orthomosaic, the normal "visual" or "true color" export from your drone software. GoGIS also handles:
- Any common compression: uncompressed, LZW, Deflate (ZIP), PackBits and JPEG.
- Big files: BigTIFF, tiled or striped, and orthomosaics in the hundreds of megapixels.
- Any coordinate system GoGIS can convert: UTM, state plane and national grids are moved onto the map automatically.
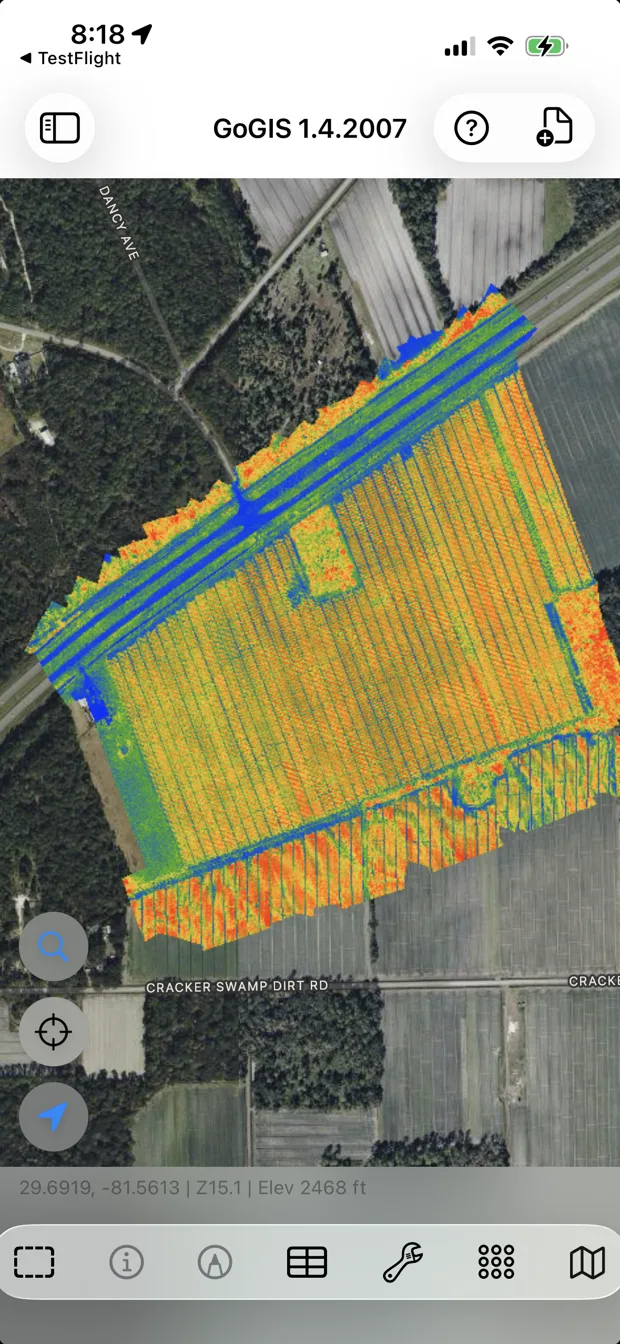
- Index and analysis rasters: single-band, 16-bit and 32-bit images (an NDVI export, a reflectance band, an elevation model) are shown with a contrast stretch so you can see the pattern. They display as a picture, not as values you can tap.
- Scanned maps: palette images such as scanned USGS topo sheets.
If the Import Doesn't Work
- "This TIFF has no georeferencing." The image has no location inside it. Export it again from your drone software or QGIS as a GeoTIFF, not a plain TIFF, JPEG or PNG.
- "This GeoTIFF has no coordinate system." The location is there but not which grid it's in. Export again with an EPSG code (most drone tools do this by default).
- "This GeoTIFF is not supported yet." Usually an unusual layout, such as bands stored separately. Export an 8-bit RGB GeoTIFF with Deflate compression and try again.
- White or black edges disappear. GoGIS makes near-white and pure-black areas transparent, so the empty border around a drone map doesn't cover the basemap. Very bright snow, cloud or deep shadow can turn see-through too.
Already have imagery as MBTiles (a ready-made tile package)? Import it the same way; GoGIS draws it directly without converting it.
Your drone flight is most useful where the decisions get made: standing in the field. GoGIS puts it there, on the phone you already carry, with no account, no server and no signal needed.